Currently Playing [None]

For Florence's birthday last week (HAPPY BIRTHDAY AGAIN!), I decided to put together a "makeup kit of beginners" for her because she had wanted to start to play around with makeup. And I thought how great it would be for me to blog about it as well so that I can not only teach her about some makeup basics but I can also teach some of you. This guide goes hand-in-hand with the products that I had purchased for her. Now, this list of items are by no means definite. There are other great dupes and beginner products out in the market, but I just find these to work great for me. I also find these products to be very affordable and thus, suitable for makeup beginners.
*Note, I'm not a makeup artist. I'm merely sharing my experience with you. If you have any more inputs on great products for beginner, feel free to leave a comment at the end of the post ~
The Makeup Bag

Of course, this is essential. You cannot have a makeup kit without a makeup bag to put all your makeup in. I usually prefer to have a medium-size to large-size makeup bag to carry around with me because I carry a LOT of stuff for touch-up purposes. So I decided to throw in this medium-sized floral patterned makeup bag for Florence. It's just the perfect size and the outer layer is plastic, so you don' have to worry about it getting wet in the bathroom. ($2.99 from Forever21)
Makeup Brushes

What's a makeup kit without makeup tools? These 4 are my vital brushes that I absolutely NEED to have in my kit. They include the Face Brush, Blush/Bronzer Brush, Eyeshadow Flat Brush and a Blending Blush. I feel that these 4 brushes are the ones that I use on a daily basis and thus, they are essentials! The names of each brush pretty much explains their function and purpose so I don't feel the need to go into greater details. If I go on vacation and can only take a limited amount of brushes with me, I'm grabbing these 4 for sure! Now, you don't have to purchase E.L.F brushes, there are a lot of alternatives/dupes out there such as Sigma, Bdellium Tools, MAC, and so on. However, why I had chosen to get E.L.F brushes is because they are a LOT more affordable (roughly $2) and their qualities are NOT too shabby for beginners. Thus, I would highly recommend these for makeup starters. When you get more professional, then you can switch to other alternatives and spent more money on tools. ($1.50 each from Dollarama)
A Foundation


Having good skin is every girl's dream! Thus, I feel like you cannot skip out on foundation. Okay, unless you are very very very fortunate and blessed to have flawless skin. But if you are like me, then foundation is your best friend! For beginners, I would recommend a powder foundation first just because I feel that liquid are a lot more difficult to work with. Plus, if you do not have the proper application, then you can look very very "cakey". I would also look for a mineral powder because they are much better for your skin and there will be less chances of a breakout. The one that I had included in this kit is one by Wet n' Wild. Now there are tons of alternatives (Physician Formula is a good one!) out in the market, so you don't necessarily have to purchase this brand. A powder foundation may not be able to completely hide all your blemishes or imperfections, but it'll be sufficient to get rid of shiny spots and redness. ($3.99 from Walmart)
Directions: You can easily apply this all over your face with the total face brush mentioned above.
An Eyeshadow Primer


Here I have included two different ways to prime your eyelids before applying eyeshadows. I REALLY REALLY wished that when I had first started makeup, someone had included these products to me! Then it would have solved a LOT of my problems that I had with creasing. This is where I would spent my money on. Like a blank canvas, your eyelids also need a good primer to ensure that the eyeshadows stay vibrant all day long and to prevent the colours from creasing. One product that I highly, highly, recommend is the Urban Decay Eyeshadow Primer Potion. I always go back to this and have not find any other primers that compares. Another method to prime your eyes is with an eye crayon. I had included this black colour one from NARS that would work as a great base for darker eye shadow looks (NYX also have more affordable eye crayons as well). (Both of these are sample sizes from Sephora)
Directions: Simply apply the both of these on your lids and smooth out before applying your shadows.
Eyeshadow Palette


For beginners, I would highly recommend getting an eyeshadow palette from your local drugstore because A) they are more affordable, B) they offer great colour choices than a single shadow and C) drugstore brands have been pushing out some AMAZING shadows in the recent years. The one that I had purchased for Florence is a Rimmel Trio (621 Orion). What I really liked about Rimmel eyeshadows is that they offer great colour choices and great quality. Plus, if you catch a sale, you can easily get a quad/trio for $5. Like most drugstore palettes, Rimmel have also included a little instruction sticker on the back of the palette. This is SOOOOOO useful if you are just starting out with makeup because it tells you directly where to apply each colour. Easy and affordable! Some other drugstore eyeshadow brands that I would recommend are Maybelline and L'oreal. ($5 from Shoppers Drug Mart)
Now, I chose a neutral palette for Florence just because they are great for an everyday look without being too dramatic and unnatural. If you are not familiar with colours or not sure how bright colours with look on you, then I would suggest getting a neutral palette because they work great with any coloured eyes and lips. Thus, less colour matching is required. If you are willing to spurge, then the Urban Decay Naked Palette 1 or 2 will be perfect for you.
Blush

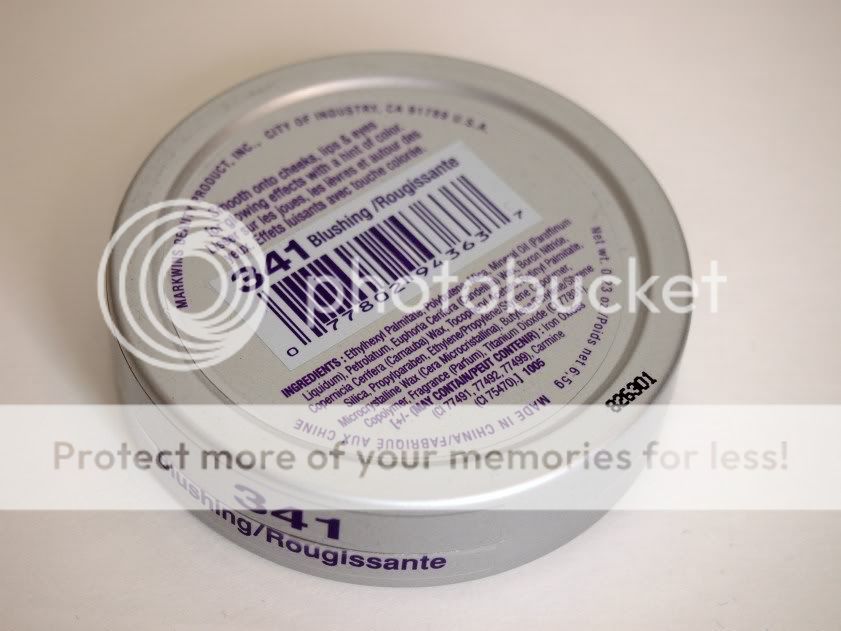
What's a face without some glow? Blush, I feel is also vital in a makeup kit. it gives your face that extra "sweetness" that it needs. I included this Wet n' Wild Face Illuminator (341 Blushing) just because it has 2 functions. It can work as a brush and as a highlighter on your cheek bones. Thus, 1 product with 2 functions = WIN! ($2 from Dollarama)
Directions: This is a cream formula, so makeup you use your clean fingers to smooth it all over the apples of your cheeks.
Lip-gloss

The final step is a touch of lipgloss. A pigmented lipgloss is much easier to work with than a lipstick. Also, they tend to be more moisturizing than a lipstick so less work is required to prevent your lips from cracking. Thus, I would recommend using lipgloss first. The one that I had picked out is by E.L.F and it is a mauve-pink type of colour. I find that pinks look great on almost everyone. Thus, they are definitely a safe choice for a first lipgloss. ($1 from E.L.F)
You may be wondering why I haven't included a mascara in this kit and that's simply because Florence wears glasses on a regular basis. Sometimes with longer lashes, it can hit the glasses and becomes uncomfortable when you blink. Thus, I had left out the mascara in this kit. However, if you do no wear glasses on a daily basis, a mascara is also a MUST! I feel that lengthier lashes really complete the eye-look. So feel free to throw a mascara in here. I would recommend the Majolica-Majorca Lash Expender or the Fiberwig mascara.
And that' it!! Wow, what a long post! This is my complete Makeup Kit for Beginners, hope you'll find it useful Florence!