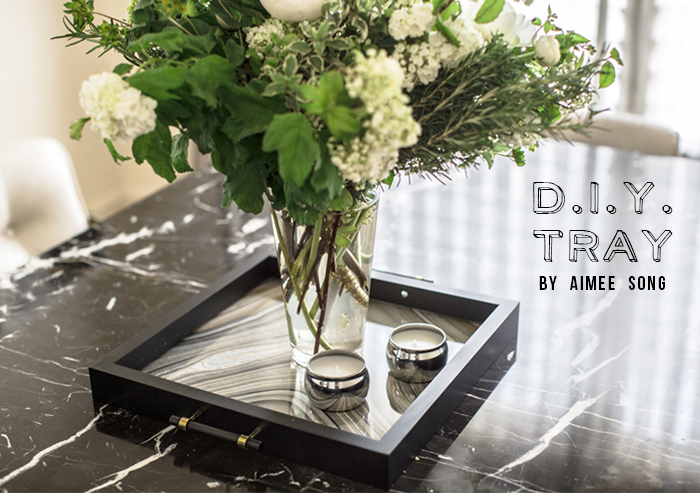
 As guest editor for Elle this month, I did a little DIY on turning a picture frame into a tray. I love incorporating trays onto pretty much any surface from coffee tables, to console tables and dining tables since they are both functional and decorative.
 Here's what you'll need:Frame, decorative paper, two handles, electric drill, screw driver, measuring tape, chalk/pencil.
1.) Head to your nearest frame store and pick a frame that goes with your decor. Keep in mind that because you'll be using it as a tray, a picture frame with more depth will work best. I purchased mine at the nearest Aaron Brothers for under $35! When picking a frame, also keep in mind that wood will be easiest to drill through.
2.) Repurpose extra old handles you have laying around or go out and find some fun ones.
 3.) Remove the back of the frame and its glass insert.
 4.) Use a measuring tape to lightly mark where you're going to drill holes to add your handles. Make sure they're symmetrical!
 5.) Using your electric drill, drill holes for each handle through the frame. Use your screw drive to tightly fasten handles. You can put the handles on the side like I did, or on the top of the frame depending on the length of your screws.
 6.) Add your decorative paper behind the glass as if you're framing a picture and you're done!
 For more DIY's, make sure to head over to Elle!